
Last updated November 14, 2026
 Architectural shingles
 Metal roofing
 Tile roofing
 GAF
 Owens Corning
 Flat & low-slope
Free roof inspection with deck photos before we talk money - GAF and Owens Corning certified installation
Roof Repair Maintenance Checklist for Santa Clara Homeowners
The most common mistake we see in Santa Clara isn’t skipping roof maintenance. It’s following a maintenance calendar built for a place with four hard seasons. Homeowners here read about spring and fall tune-ups, do a quick visual pass, and assume they’re covered. Then the first real storm of the season finds the one seam nobody checked. Santa Clara’s roof stress doesn’t spread evenly across twelve months. It compresses into two windows: the weeks before the rains arrive in late October, and the weeks after they taper off in late March. This guide is built around those two moments, and around the handful of failure points that account for most leaks we’re called out to inspect across Santa Clara.
Quick Answer
A roof maintenance checklist for Santa Clara should center on two inspections a year: one in late October before the rainy season begins, and one in late March after it ends. At each inspection, focus on five transition points (valleys, flashings, pipe boots, skylights, and eave edges), document condition from the ground with your phone, and check the attic for staining or moisture. Granule loss in the gutters is normal in small amounts, but heavy, ongoing loss usually signals it’s time to price replacement rather than keep patching.
Styles & brands we work with
- Architectural shingles
- Metal roofing
- Tile roofing
- GAF
- Owens Corning
- Flat & low-slope
Table of Contents
- Why Generic Seasonal Checklists Don’t Fit Santa Clara
- The Two-Window Inspection Calendar for Santa Clara Roofs
- The Five Transition Points That Cause Most Santa Clara Roof Leaks
- How to Document Your Roof From the Ground With a Smartphone
- What Granule Loss in Your Gutters Actually Tells You
- Attic Clues That Show Up Before Exterior Roof Damage
- Repair, Replacement, or Just Monitoring? How to Decide
- Choosing a Roofing Contractor in Santa Clara
Why Generic Seasonal Checklists Don’t Fit Santa Clara
Most roofing maintenance advice online is written for the Northeast or Midwest, where stress on a roof is spread across snow load, freeze-thaw cycles, and ice damming through a long winter. Santa Clara doesn’t have any of that. What it has is a dry season that stretches for months, followed by a relatively short but focused rainy period, plus long stretches of intense sun that bake shingles year after year. That changes what a checklist should prioritize.
Here’s what we’ve learned checking roofs across Santa Clara: the sun does more cumulative damage than the rain does. UV exposure dries out shingles, weakens seals around penetrations, and causes sealant and flashing materials to shrink and pull away from the surfaces they were bonded to. Then the rains arrive, and all of that deferred wear shows up at once, usually at a seam or a small gap that wasn’t visible in August. In other words, the dry season does the damage and the wet season reveals it.
That’s why the sequence matters more than the label. A fall inspection should catch vulnerabilities before water finds them. A spring inspection should catch damage the wet season already did, while it’s fresh and while small repairs are still small. A checklist that treats both inspections the same way misses the point of either one. Santa Clara roofs need a pre-rain sweep and a post-rain assessment, not two identical seasonal passes.
None of this means you need to be on the roof constantly. A grounded, twice-a-year routine, done carefully, catches more than an anxious every-weekend climb that skips the key points.
The Two-Window Inspection Calendar for Santa Clara Roofs
Here’s the calendar we recommend for most Santa Clara homes. It’s deliberately short and specific instead of spread out across the year.
- Late September to mid-October – pre-rain prep: This is the window before the first real storms. Clear gutters and downspouts, check that flashing is intact and sealed, look for loose or lifted shingles, and confirm that any skylight or vent penetrations are tight. This is your chance to fix a small thing before it becomes a wet-season problem. Ideally you do this inspection before the first storm front arrives, not after.
- Late March to mid-April – post-rain assessment: Once the wet season has done its work, inspect again with fresh eyes. Look for shingles that moved or curled, granules shedding into gutters, staining on soffits or fascia, and any signs of moisture in the attic. This is where you confirm whether the fall prep held up and whether anything needs repair while the weather is still mild.
- One quick midsummer check: A short July or August pass, done from the ground, is worth the effort. Look for sun damage, curled shingle tabs, and anything that looks newly loose after the hottest stretch of the year. It’s a five-minute check that can flag trouble early.
For most Santa Clara homes, that’s the whole year: two real inspections and one quick look. If your roof is newer or in very good shape, you can shorten the spring assessment to a visual pass. If it’s aging, the two main windows are the ones to treat seriously. And if you want a professional, independent assessment at either window, a Sunstone Roof Repair inspection is available as a standalone service, with no requirement to purchase a repair or a replacement afterward. An inspection should give you answers, not a sales pitch.
The Five Transition Points That Cause Most Santa Clara Roof Leaks
If you only check five things on your roof, check these. In our experience across Santa Clara, these transitions are where the majority of leaks begin, because they’re where different materials or different surfaces meet, and seams are where wear shows up first.
1. Valleys
A valley is where two roof planes meet and channel water off the roof. It’s a high-traffic water zone, and any debris that collects there – leaves, twigs, grit from aging shingles – holds moisture against the surface. Check for debris accumulation, visible rust or wear on metal valley flashing, and shingle edges that look lifted near the valley center.
2. Flashings
Flashing is the metal or membrane that seals the roof at walls, chimneys, and other vertical surfaces. The transition flashing where a chimney, skylight, or HVAC curb meets the field of the roof is the single most overlooked failure point we see. Sealant and flashing materials shrink and pull away over time, and the gap is often invisible from the ground. Check for lifted edges, cracking sealant, and gaps where metal meets shingle or masonry.
3. Pipe Boots
The rubber or plastic collar around plumbing vents – what roofers call a pipe boot – is a common leak source as the material ages and cracks. Look at each one for splits, missing collars, or cracked rubber. On a Santa Clara roof, the sun does a number on these, so they’re worth a closer look every inspection.
4. Skylights
Skylights have their own flashing, their own seals, and their own condensation issues. Check for moisture between the panes, cracked or fogged glass, and lifting or crumbling sealant around the perimeter. Santa Clara skylights get a lot of direct sun, and the seals take the brunt of it.
5. Eave Edges
Eave edges are where the roof meets the fascia at the bottom edge. Check for rot, lifting drip edge, water staining on fascia boards, and shingle edges that overhang too far or have pulled back. This is also where you’ll see the early signs of ice damming in cold climates, but in Santa Clara it’s mostly about sun wear and water backing up from clogged gutters.
Walk these five points from the ground with binoculars at each inspection and note what you see. Most leaks on Santa Clara roofs start at one of these transitions, so a quick five-point check is the highest-value thing you can do.
How to Document Your Roof From the Ground With a Smartphone
You don’t need to get on the roof to build a useful record of its condition. In fact, we’d rather you didn’t – a fall from a ladder is far more dangerous than a roof leak. Here’s the ground-level documentation method we recommend instead.
- Walk the perimeter in good light. Go around the whole house, ideally in the morning or early afternoon when the sun is high enough to reveal texture but low enough to throw shadows on lifted shingles.
- Take a wide photo of each roof plane. Stand back, zoom out, and get the full slope in the frame. You’re building a baseline of the overall shape and coverage.
- Photograph each of the five transition points. Use your phone’s zoom (carefully, so it stays sharp) to capture the valleys, flashings, pipe boots, skylights, and eave edges. These are the photos you’ll compare a year from now.
- Shoot into the gutters after storms. A clear photo of what the gutters catch tells you a lot about granule loss and debris without getting on a ladder.
- Photograph your attic. The ceiling deck, rafters, and any visible insulation are your interior baseline. Take shots of the same spots each time.
- Label the photos by date and location. A simple folder for “fall 2025” and “spring 2026” with named shots makes comparisons useful.
If you ever photograph a leaking spot, note the weather and the time. It helps a professional diagnose the source. And when you’re ready to have a trained eye look at your roof, the same documentation can help start the conversation faster. If you decide it’s time for repair, our trained crew handles roof repair across the area, and technicians with up to 12 years of experience know exactly what to look for at each of those five points.
What Granule Loss in Your Gutters Actually Tells You
Those little granular specks that collect in your gutters and along the drip line are normal, up to a point. Shingles are made with a layer of mineral granules on top, and they shed some over their life. The question isn’t whether you see granules – it’s whether the loss is stable or accelerating.
Here’s how to read it:
- A handful of grit after a storm is normal. Every asphalt shingle roof sheds some granules, especially in the first year or two after installation.
- Consistent, growing piles year after year is a warning. If the same gutters fill with noticeably more granule grit each season, the shingle surface is breaking down faster than it should be.
- Bare patches or exposed fiberglass on the roof surface are a bigger warning. When you can see a matte finish or lighter-colored spots through the granules, that section has lost its protective layer and is now vulnerable to direct sun and water.
- Granule loss after a hailstorm or impact is worth checking. Hail is uncommon in Santa Clara, but when it does hit, granule loss and impact marks show up right away.
Now, the question homeowners actually ask: does heavy granule loss mean replace the roof? Not automatically. But sustained, heavy granule loss combined with bare patches, curling, or a roof that’s past the middle of its expected life often points to replacement rather than repeated patching. If you’re weighing that decision, our roof replacement service starts with an honest look at whether the roof still has life in it. We’d rather tell you to monitor than sell you a new roof you don’t need yet.
Because we work with materials from GAF, CertainTeed, Owens Corning, and IKO, we can match replacement sections closely to an existing roof or recommend the best-value product for your budget and climate. And because we work across all of them, our recommendation is driven by what your roof needs, not by the brand we happen to stock.
Attic Clues That Show Up Before Exterior Roof Damage
Some of the earliest signs of roof trouble never appear on the roof itself. They appear in the attic. If you can safely get into your attic – and can do so without standing on the ceiling joists, which is dangerous – a flashlight and a few minutes are worth the effort.
Look for these:
- Water staining on the roof deck or rafters. Dark rings, tide-line streaks, or fresh stains on the wood are direct evidence that water is getting in somewhere above.
- Daylight through the deck boards. Small gaps are normal, but visible pinpoints of daylight in the sheathing can indicate a gap that’s letting moisture in.
- Moisture or dampness on the underside of the deck. Feeling moisture on the wood, or seeing condensation on rafters, suggests inadequate ventilation or a leak.
- Compressed or damp insulation. Insulation that’s matted down, saturated, or pulling away from the roof line has lost its effectiveness and can signal moisture problems.
- Discolored or peeling paint on interior ceilings. That’s an attic-side symptom showing up inside the house.
What all of these have in common is that they show up before the exterior damage is obvious. Catching a stain on the deck early usually means a targeted repair, not a full replacement. And in Santa Clara, where the dry season keeps the roof looking fine for months, the attic is often where the real story lives.
Repair, Replacement, or Just Monitoring? How to Decide
Most homeowners we talk to are worried about the same thing: being pushed into a full replacement when a repair would have done the job. That’s a fair concern, and it’s why we run our business around three separate stages – inspection, repair, and replacement – instead of bundling them into one sales conversation.
Here’s a simple way to think about the decision:
- Repair makes sense when damage is localized, the roof is in the earlier part of its expected life, and the issue is at a specific transition point or section. A damaged pipe boot, a failed flashing, or a section of storm-lifted shingles is a repair.
- Replacement makes sense when damage is widespread, when you’re seeing heavy granule loss combined with bare patches and curling across multiple planes, or when the roof is clearly aging out. Patching a roof that’s already shedding its surface is throwing money at a problem you can’t outrun.
- Monitoring makes sense when the roof is in good shape, the issues you found are minor and stable, and a documented baseline is the most useful thing you can do. We’re comfortable telling a homeowner “watch this during the spring inspection” rather than pushing a service call.
One thing to watch for if you’re receiving estimates: the difference between a “repair” quote that quietly assumes half the roof and a real replacement quote. A written line-item quote makes that distinction clear. And if you’re ever unsure which path you’re on, an independent inspection – not tied to any purchase – is the answer. That’s why we offer an inspection on its own. The signal we want to send is the honest diagnosis, not the sale.
Choosing a Roofing Contractor in Santa Clara
Once you’ve documented your roof and you know something needs attention, the next decision is who to trust with it. Here’s what we’d look for if we were hiring a roofer in Santa Clara.
- They can explain why a repair or a replacement is needed. A contractor who jumps straight to replacement without walking you through the evidence is telling you something about their priorities.
- They put estimates in writing, line by line. A written line-item quote protects you from scope creep and change orders later.
- They can work with multiple material brands. A single-brand contractor has an incentive to sell the brand. Cross-brand experience – GAF, CertainTeed, Owens Corning, IKO – lets them match your existing roof or recommend the right product for your budget.
- They offer a real inspection. A standalone inspection shows they’re willing to tell you what you don’t need, which is often the most useful information you can get.
- They’re familiar with the local market. Santa Clara roofs live under the same sun and the same rainy-season rhythm, and a crew that works here knows the specific stress points.
One last point: the local Santa Clara market is full of roofers who show up quickly and disappear. Ask what happens after the work is done. Ask what they’ll put in the estimate, and what they won’t. A contractor who’s comfortable being specific and transparent is one you can work with. We’re licensed and insured, and we answer the phone. Call us for a free estimate – we can tell you what your roof actually needs.
Common Mistakes to Avoid
We’ve seen the same handful of mistakes from homeowners across Santa Clara, and they usually make a small problem worse. Here’s what to avoid:
- Using a four-season checklist. A “spring and fall” calendar built for the Northeast misses the two timing windows that actually matter here. Santa Clara roofs need a pre-rain pass and a post-rain pass – everything else is secondary.
- Skipping the transition points. Homeowners often check for missing shingles and call it done. The leaks come from the five transition points. Check them first.
- Climbing the roof to “check it yourself.” A fall from a ladder is a much bigger problem than a leak. Document from the ground, and let a trained technician handle the walking.
- Assuming granule loss always means replacement. A handful of grit after a storm is normal. Panicking and calling for a replacement quote when the roof is still in the monitoring stage is an expensive mistake.
- Ignoring the attic. Attic staining and moisture are the earliest clues, and missing them lets a small leak turn into a bigger one before you see it from outside.
- Accepting a verbal estimate. A quote without line items is a quote that can grow after work starts. Insist on a written, line-item estimate so the price is fixed before a single shingle is touched.
- Waiting until after the first storm. The whole point of the October window is to fix things before the rain starts. Calling in November means you’re already reacting to water instead of preventing it.
See the difference
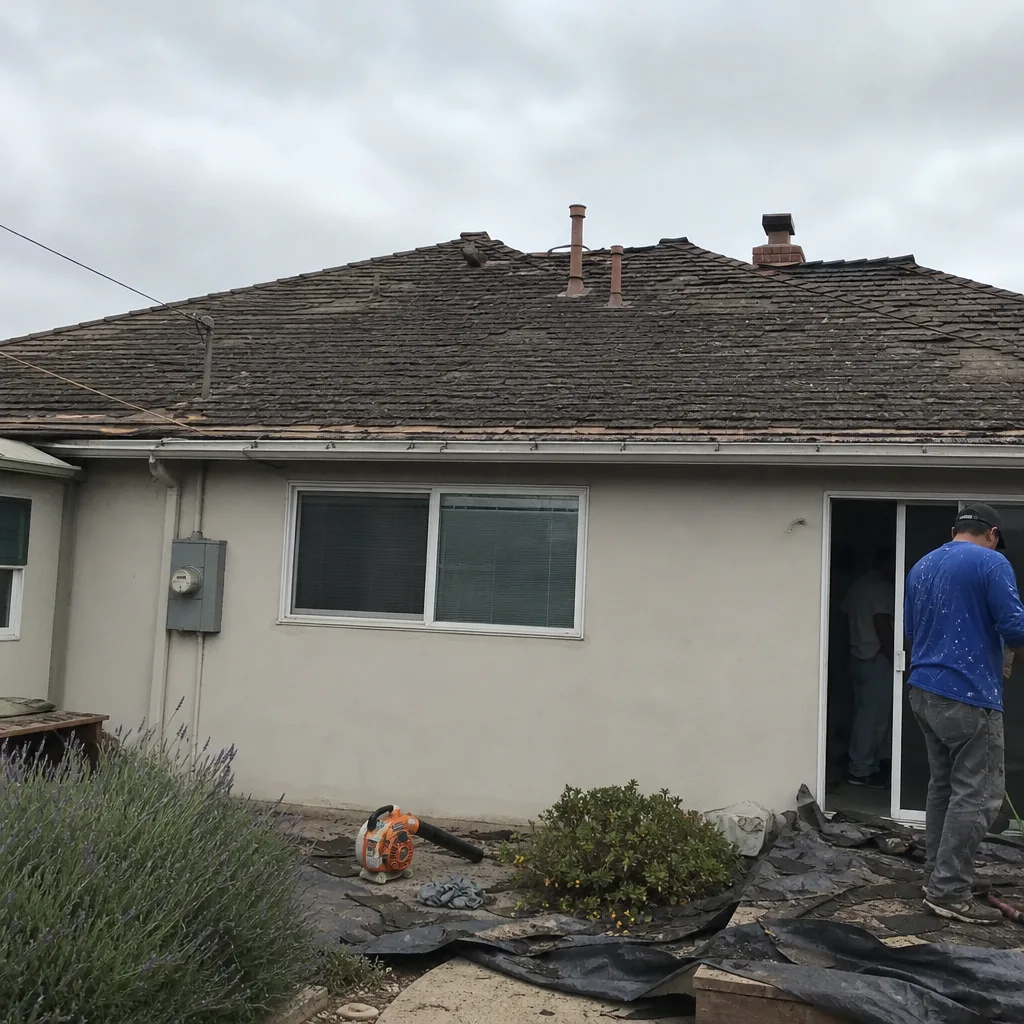 Before
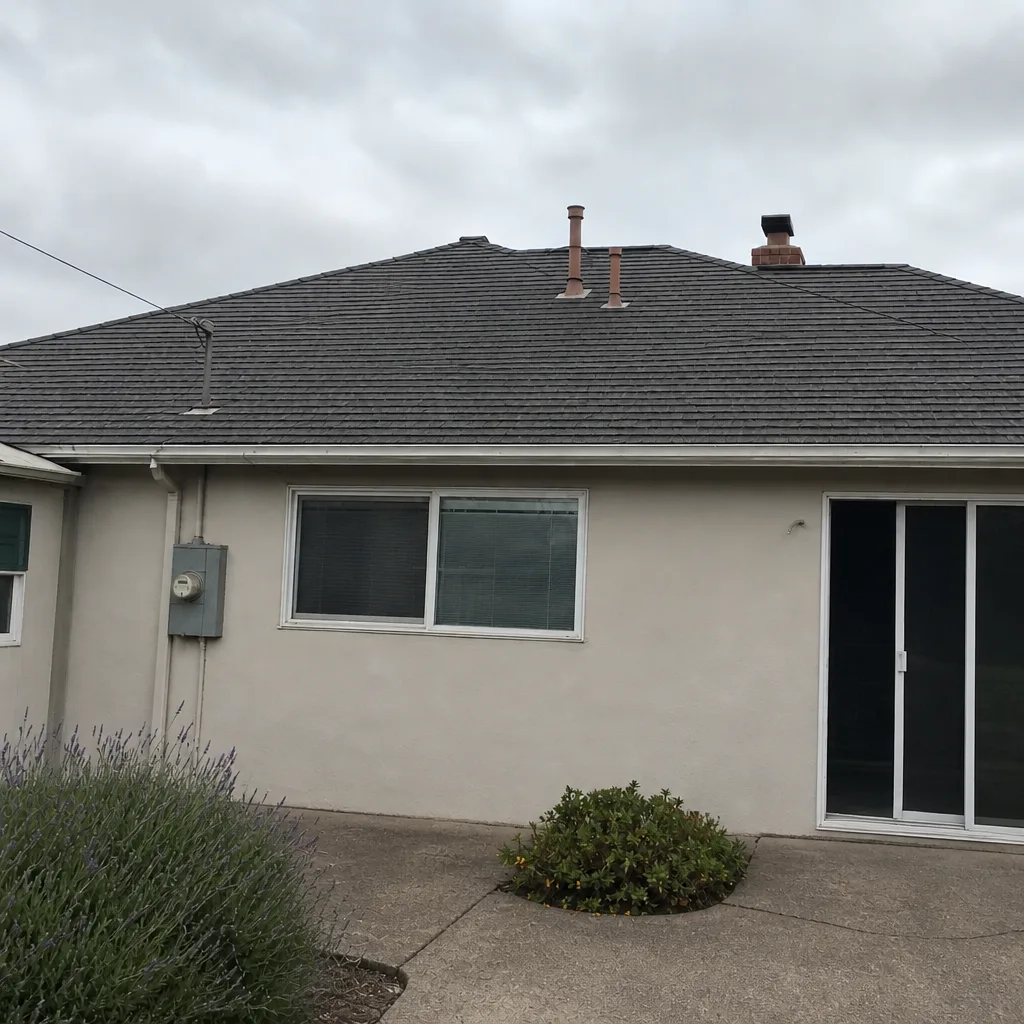 After
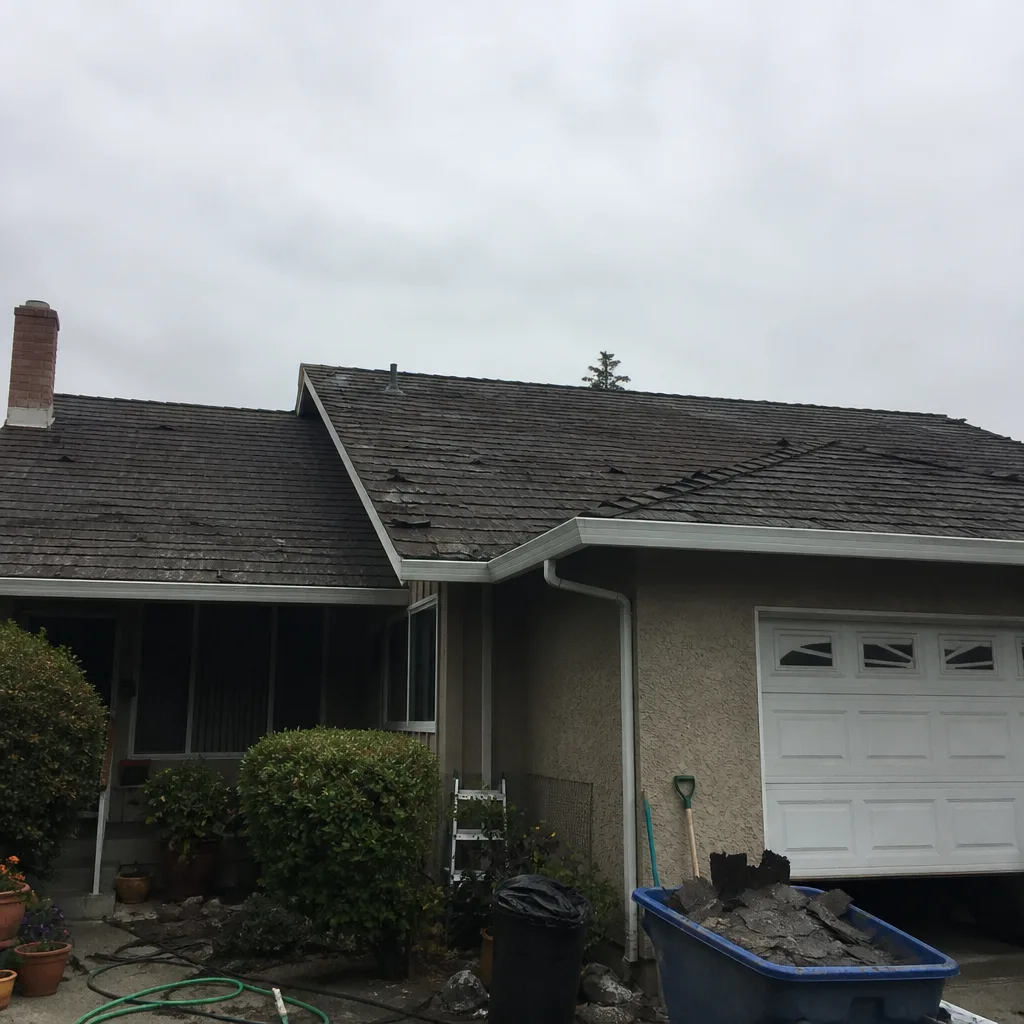 Before
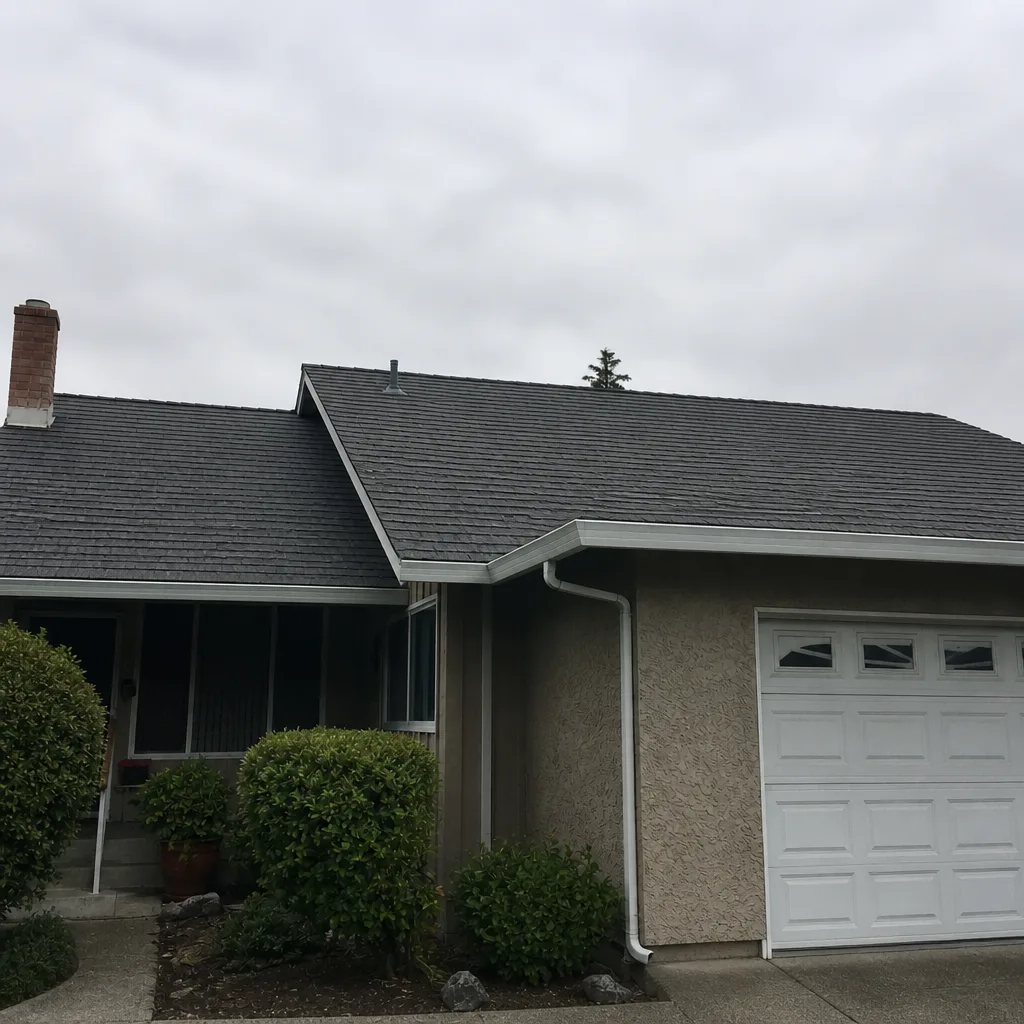 After
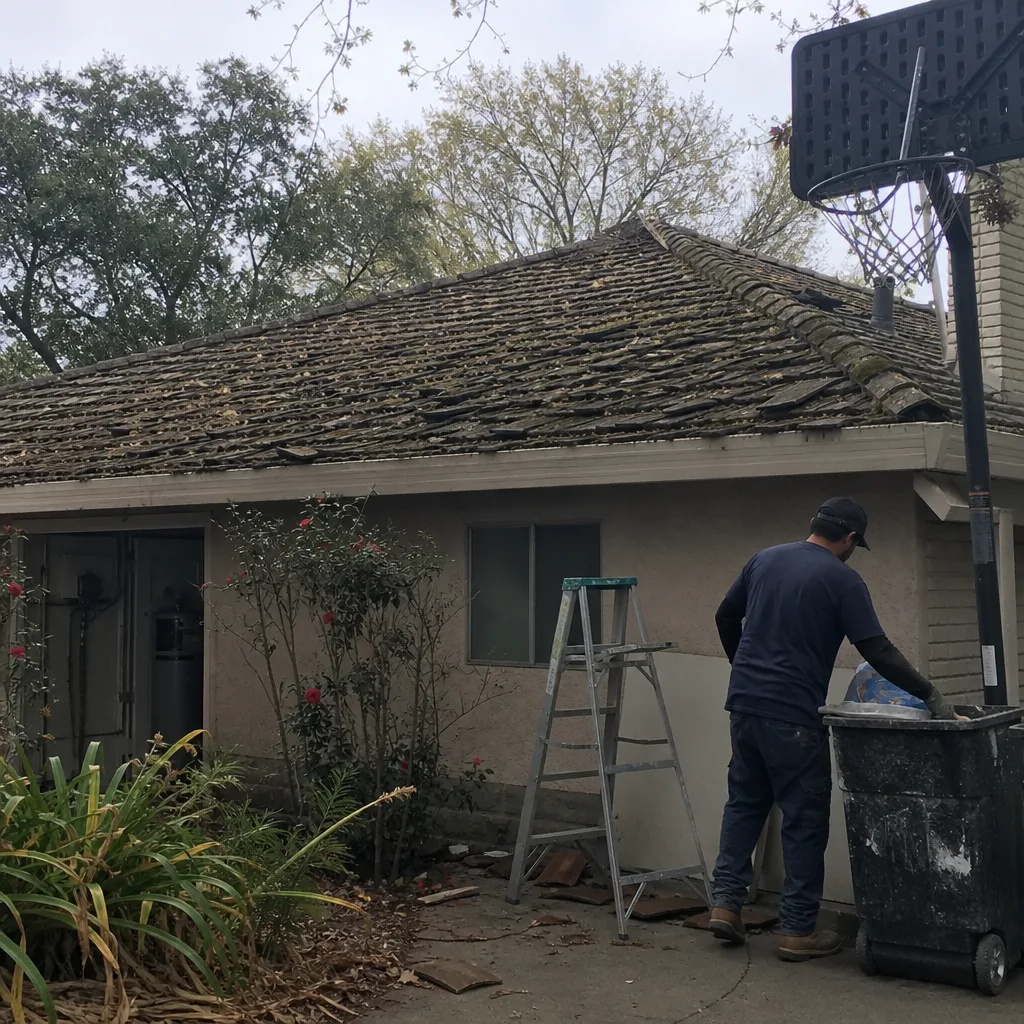 Before
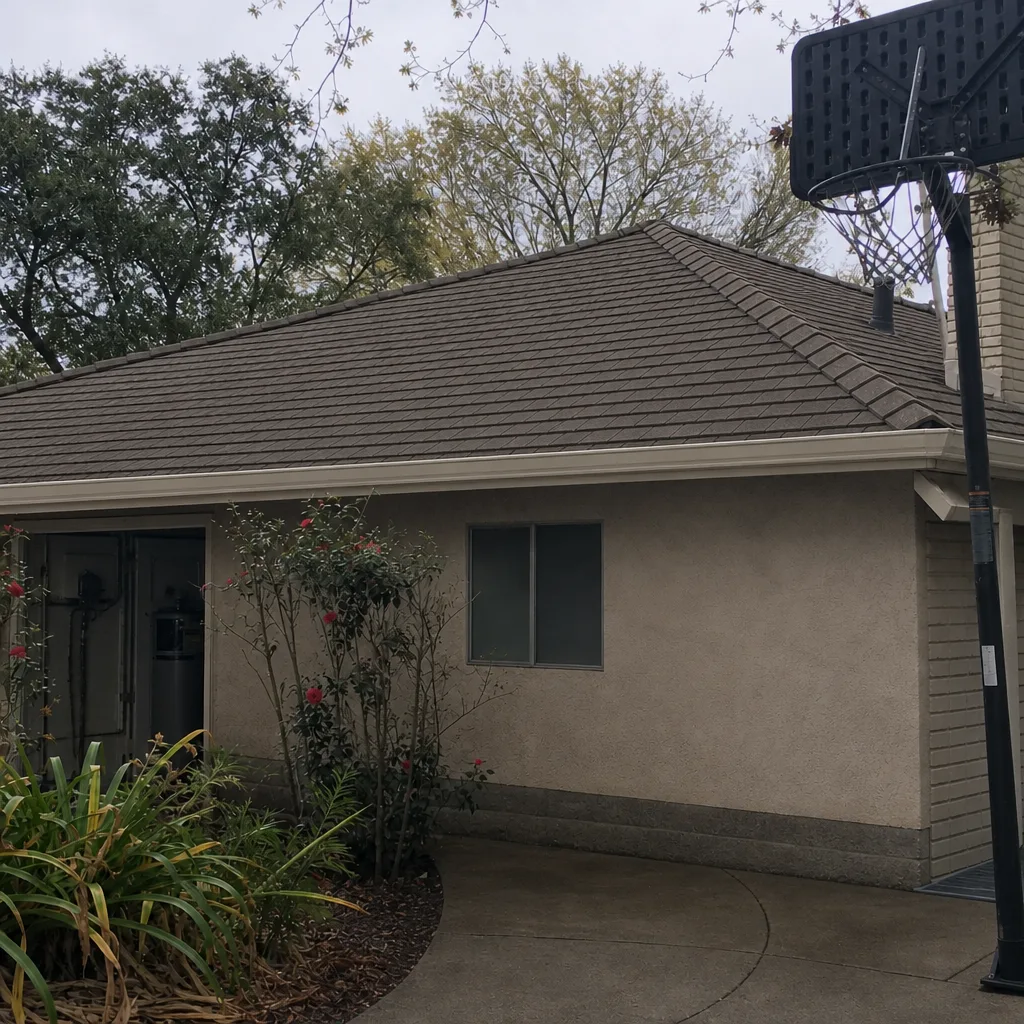 After
When to Call a Professional
Some issues can wait for the next inspection. Others need a call now. Call a professional if you see water staining on your ceiling or attic deck, active dripping, flashing that’s visibly separating from a wall or chimney, a skylight with cracked glass or interior moisture, or shingles that have lifted or disappeared over a section of roof. If your roof is still under warranty through a manufacturer, get any work documented in writing, since warranty processes depend on the materials being installed and serviced correctly. If you’re unsure whether something is minor, that uncertainty is itself a good reason to call. A proper inspection is quick, and it gives you a documented baseline for the next year. Sunstone Roof Repair offers free estimates in Santa Clara – call (855) 473-8840. We’ll tell you exactly what your roof needs, repair, replacement, or nothing at all.
Frequently Asked Questions
Twice a year for most homes: a pre-rain inspection in late September or October, and a post-rain inspection in late March or April. A quick midsummer visual pass from the ground is worth adding if your roof is older. The two main windows are timed to Santa Clara’s rainy season, when damage gets revealed.
The transition flashing where a chimney, skylight, or HVAC curb meets the field of the roof. It’s where materials meet, and it’s where sealant and flashing shrink and pull away over time. From the ground, it usually looks fine. It’s the single most common overlooked leak source we find.
Not automatically. A small amount of granule grit in the gutters after a storm is normal. Consistent, heavy loss combined with bare patches, curling shingles, or a roof that’s clearly aging out usually points to replacement. If you’re unsure, a documented baseline and a professional look will tell you whether to monitor or replace.
Yes. Walk the perimeter with your phone, photograph each roof plane, capture each of the five transition points, and photograph your attic. Take the same shots each season so you can compare. Never climb a ladder to check the roof yourself. A trained technician can walk the roof safely.
It depends on the cause. Storm damage is often covered, while wear-and-tear and gradual deterioration usually isn’t. Check your policy, and document everything you find with photos and written estimates. We can work with your insurer where coverage applies, but the written estimate is what sets your price.
Most cities require a permit for certain roof repairs and replacements, so ask your city’s building department about your specific project. We can discuss permit requirements as part of your estimate and confirm what your job needs before any work starts. Call (855) 473-8840 to schedule a free estimate.
The Bottom Line
Roof maintenance in Santa Clara isn’t about following a four-season calendar. It’s about two well-timed inspections, focused on the five transition points that cause most leaks, backed by ground-level photo documentation and a quick attic check. Watch the gutters for granule loss, read it honestly rather than panicking, and let the pre-rain and post-rain windows guide your year. If a repair is needed, get a written, line-item estimate from a contractor who works across multiple material brands and is willing to tell you when the right answer is monitoring. An inspection should give you answers, not a sales pitch. And if you ever want a trained eye on the roof, we’re happy to provide one.
Written by the team at Sunstone Roof Repair.